

If you’ve been looking for the ultimate comforting bake from scratch, this easy honey whole-wheat sandwich bread is about to become a staple in your kitchen. There’s truly nothing on earth quite like the experience of baking a loaf of bread completely from scratch. For the longest time, I would just buy a standard loaf from the grocery store because it was easy and convenient. But to be honest, I felt completely unfulfilled doing that.
Baking has been a creative pursuit of mine since I was 12 years old, when my father first taught me how to make simple Jiffy brand box-mix corn muffins. Since starting this food blog, I have been deeply inspired by amazing bakers in the community, testing out incredible bread recipes like The Spruce Eats’ round bread and Sally’s Baking Addiction’s classic sandwich loaf. Today, I’m super thrilled to share my own upgraded version: a foolproof Honey Whole-Wheat Sandwich Bread that’s incredibly fluffy, nutritious, and perfect for your favorite family sandwiches!

If you’re new to working with yeast, don’t let the process cause you to give up before you start. This recipe is specifically scaled to be uncomplicated, beginner-friendly, and completely stress-free.
Why This Recipe Works
- The Soft Crumb Secret: Whole wheat flour on its own can produce a very dense, heavy loaf. By blending it with a portion of all-purpose flour, we add vital gluten structure that ensures the bread stays light, fluffy, and pillow-soft.
- Natural Honey Moisture: Honey does more than just add a gentle, comforting sweetness to the dough. It acts as a natural humectant, meaning it holds onto moisture molecules, which prevents your sandwich slices from drying out on the counter.
- Therapeutic Kneading: Baking bread from scratch is incredibly therapeutic and relaxing. Taking ten minutes to knead the dough by hand is the perfect way to relieve stress while building a strong gluten network for a tall, beautiful rise, though you can also use a bread machine if you prefer (instructions in recipe card below).
The Key Ingredients
Let’s look at the few simple pantry staples required to create this wholesome sandwich loaf:
Active Dry Yeast
Yeast is the living engine behind our impressive rise. Because this recipe uses active dry yeast, we give it a quick 5-minute head start in warm liquid to “wake it up” and ensure it’s alive and foamy before mixing.
Lukewarm Water & Melted Butter
Your liquid base needs to be perfectly lukewarm—ideally around 110°F (43°C). If the water is too cold, the yeast won’t activate; if it’s too hot, it will kill the yeast. Two tablespoons of melted butter adds just enough fat to tenderize the interior crumb.
The Flour Blend
We use a combination of whole wheat flour and all-purpose flour. This gives you the rustic, nutty flavor and health benefits of whole grain while keeping the bread soft enough for everyday lunchtime or even dinnertime sandwiches.
Step-by-Step Baker’s Tips for Success
Baking bread is a beautiful science of timing. Keep these critical checkpoints in mind for a perfect bake:
1. Always Verify Your Yeast Foam

When you stir your active dry yeast into the warm water, honey, and butter mixture, let it sit undisturbed for 5 full minutes. It should develop a frothy, bubbly, creamy foam on top. If it stays flat, that usually means that your yeast is dead, and your bread will not rise. Always use fresh yeast for the best results!
2. Knead with Care
Move your dough to a lightly floured surface and knead it thoroughly for 10 minutes if you don’t use a bread machine instead. If the dough feels a bit too sticky, sprinkle a teaspoon of all-purpose flour at a time onto your hands. Be careful not to add too much extra flour, or your dough will turn stiff and dry.
3. Time Your Second Rise Right
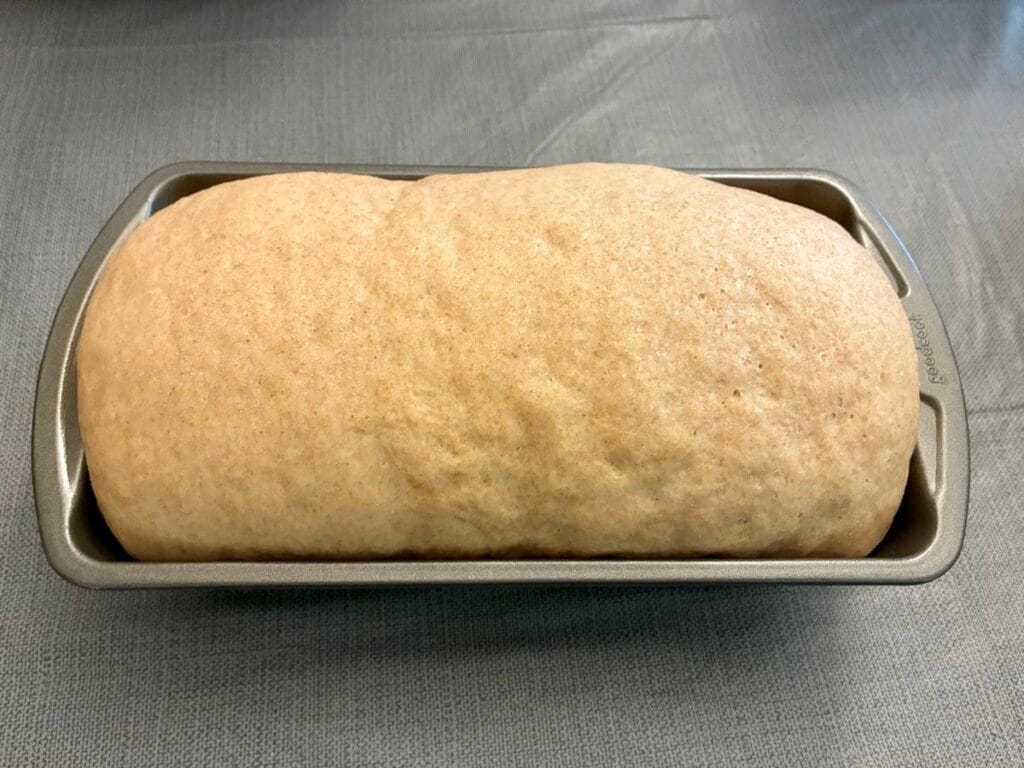
Once your shaped log is fitted into your greased 9×5-inch loaf pan, let it rise for about 35 to 45 minutes. You want the center of the dough to crown about 1 inch above the top rim of the pan before it slides into the preheated oven.
Troubleshooting Common Bread Mistakes
“Why did my loaf deflate or spill over the sides?”
This is a classic sign of over-proofing, which means the dough sat on the counter for too long during its second rise. If the yeast expands past its limit, the gluten structure weakens and collapses in the oven heat. Keep a close eye on your pan and preheat your oven early!
“How do I get a perfectly soft sandwich crust?”
For a soft, shiny bakery-style finish, brush the top of the hot loaf with a thin layer of melted butter immediately after removing it from the oven. The warmth of the crust will absorb the butter, locking in moisture and softening the outer edges completely.
“What is the best pan for this easy honey whole-wheat sandwich bread recipe?”
A light-colored aluminum 9×5-inch loaf pan is highly recommended. Dark-colored metal or glass pans absorb oven heat aggressively, which can cause the side and bottom edges of your sandwich bread to turn out a bit tough or crunchy. This usually goes away after the cooled bread is stored overnight in a sealed container or Ziplock type bag.
How to Make This in a Bread Machine (Dough Cycle Method)
If you love the flavor of fresh whole wheat bread but want a completely hands-off prep experience, you can easily use a bread machine to do the heavy lifting! For the best bakery-style results, I recommend using your machine to mix, knead, and handle the first rise, then baking the loaf in a traditional 9×5 pan so you still get that classic, tall sandwich slice look.

The Step-by-Step Machine Process:
- Layer the Ingredients: Add the lukewarm water, melted butter, and honey to your bread machine pan first. Next, add the whole-wheat flour, all-purpose flour, and salt on top of the liquids. Finally, make a small well in the dry flour and sprinkle the active dry yeast inside (keeping it from touching the wet layer until the machine starts).
- Run the Dough Cycle: Select the Dough Cycle on your bread machine and press start. The machine will perfectly mix your ingredients, handle the kneading, and warm the dough for its official 1-hour first rise.
- Shape and Bake: Once the cycle beeps, gently remove the soft, pliable dough from the machine. Move it to a lightly floured surface, shape it into your log, and let it complete its second rise in your greased 9×5-inch loaf pan for 35 to 45 minutes before baking in the oven at 375°F (190°C) exactly as written!
Love Baking Scratch? Check These Out!
If you enjoyed mastering this wholesome loaf, keep your kitchen momentum going! Check out my ultra-creamy [Easy One-Bowl Eggless Vanilla Almond Cake] or my chewy [Almond Butter Oatmeal Cookie Bars] for the perfect sweet treat next. Have a blessed day.

Honey Whole-Wheat Sandwich Bread

Equipment
- 1 9×5 inch loaf pan
- 1 Large Mixing Bowl
- 1 Large Mixing Spoon
- Fork stainless steel preferably – for stirring the yeast mixture
- Measuring cup and spoons
Ingredients
- 1 ¼ cups Lukewarm water warmed to about 110°F / 43°C
- 2 tbsp Melted butter
- 2 tbsp Honey
- 2 ¼ tsp Active dry yeast 1 standard packet
- 1 ¼ tsp Salt
- 2 cups Whole-wheat flour
- 1 ½ cups All-purpose flour plus an extra teaspoon or two if needed for kneading
Instructions
- Activate the Yeast: In a large mixing bowl, combine 1 1/4 cups of lukewarm water, 2 tablespoons of melted butter, and 2 tablespoons of honey. Sprinkle the active dry yeast over the top, stir gently with a fork, and let it sit for 5 minutes until frothy and foamy.
- Form the Dough: Add the whole wheat flour, all-purpose flour, and salt into the bowl with your yeast mixture. Stir with a sturdy spoon or fork until a soft dough starts to form and pulls away from the sides of the bowl.
- Knead Until Smooth: Turn the dough out onto a lightly floured surface. Knead continuously for 10 minutes by hand (or use a stand mixer with a dough hook). Sprinkle with a teaspoon of extra flour if needed, keeping the dough soft and slightly tacky, but not stiff.
- The First Rise: Lightly grease a large bowl with oil or cooking spray. Place the kneaded dough inside, turning the ball to coat all sides in the oil. Cover the bowl with a clean kitchen towel and let it rise in a warm environment for 1 hour, or until doubled in size.
- Shape the Loaf: Grease a standard 9×5-inch loaf pan. Gently punch down the risen dough to release the trapped air. On a lightly floured surface, pat or roll the dough into a small rectangle, then roll it tightly into a stable log shape, pinching the seams and tucking the ends under.
- The Second Rise: Place the shaped log seam-side down into your prepared loaf pan. Cover it loosely with a towel and let it rise for 35 to 45 minutes, or until the dough has crowned about 1 inch above the top rim of the pan.
- Bake to Golden: Preheat your oven to 375°F (190°C). Bake the loaf for 28 to 32 minutes until the crust is a deep golden brown and the loaf sounds hollow when gently tapped on top.
- Soften and Cool: Remove the bread from the oven and immediately brush the top crust with a little melted butter to soften it. Let it rest in the pan for 5 minutes, then turn the loaf out onto a wire rack to cool completely before slicing.
Notes
Bread Machine Note: To make this hands-off, place the wet ingredients in your bread machine pan first, followed by the flours and salt, and place the yeast in a small well on top. Run the machine on the Dough Cycle for mixing, kneading, and the first rise. Once the cycle finishes, remove the dough, shape it into a log, place it in your 9×5 pan for the second rise, and bake in the oven as directed.