

*Recipe Updated with New Photos and Tips!*
There’s absolutely nothing like the smell of fresh bread baking in your kitchen, but for a long time, I was completely intimidated by yeast. When I first started this blog, my early bread recipes were a bit of a guessing game. Today, I’m giving this space a major upgrade with a foolproof, bakery-quality staple: Honey Butter Sandwich Bread.

Are you tired of store-bought sandwich loaves that turn crumbly or are packed with mysterious preservatives? This easy, home-baked version is the ultimate everyday loaf. It bakes up incredibly soft, pillowy, and large enough for a full week of sandwiches. Best of all, you only need basic pantry ingredients and a standard 9×5-inch loaf pan to make it happen.
Why This Recipe Works
- The Honey-Butter Enrichment: Honey acts as a natural humectant. This means it physically locks in moisture, allowing the bread to stay soft and fresh for days on your counter without any artificial shelf-stabilizers.
- Perfect 9×5 Scale: Have you ever made a bread recipe only to have it overflow the pan or turn out short and flat? This recipe uses exactly 450 grams of flour (plus a touch extra for kneading). It’s been mathematically scaled to guarantee a towering, beautiful crown in a standard large loaf pan.
- Beginner-Friendly Hydration: We balanced the liquid-to-flour ratio to hit a comfortable 75% hydration. The dough is supple and easy to handle by hand or in a stand mixer without turning into an unmanageable, sticky mess.
- Looking for a heartier, rustic option? Try my reader-favorite [Honey Whole Wheat Bread] recipe next!
The Key Ingredients
Before you tie your apron, let’s talk about what goes into this loaf and why each ingredient matters:

Active Dry Yeast
This gives our bread its classic, airy lift. Always ensure your water is warm to the touch (around 110°F/43°C), similar to warm bathwater. If the water is too hot, it will kill the yeast; if it’s too cold, the yeast won’t activate.
Unbleached All-Purpose Flour
This keeps the interior crumb tender and light. You can easily swap this 1:1 with bread flour if you prefer a slightly chewier slice with more structural integrity.
Honey
Aside from offering a gentle, warm sweetness, the sugars in honey feed the yeast to kickstart an incredible, reliable rise.
Melted Butter
Fat coats the flour’s proteins, softening the gluten strands. This gives the bread its signature velvety, melt-in-your-mouth texture.
The Best Loaf Pan for Soft Slices
For the ultimate soft texture all the way around the loaf, use a light-colored aluminum pan and grease it with a thin layer of softened butter or neutral oil. If you use a dark metal pan or an organic pan spray, the pan will absorb heat much faster, which can make the side and bottom edges of your bread turn out a bit tough or crunchy. If baking in a dark pan, start checking your loaf for doneness right at the 30-minute mark.
Baker’s Tips for the Perfect Honey Butter Sandwich Bread
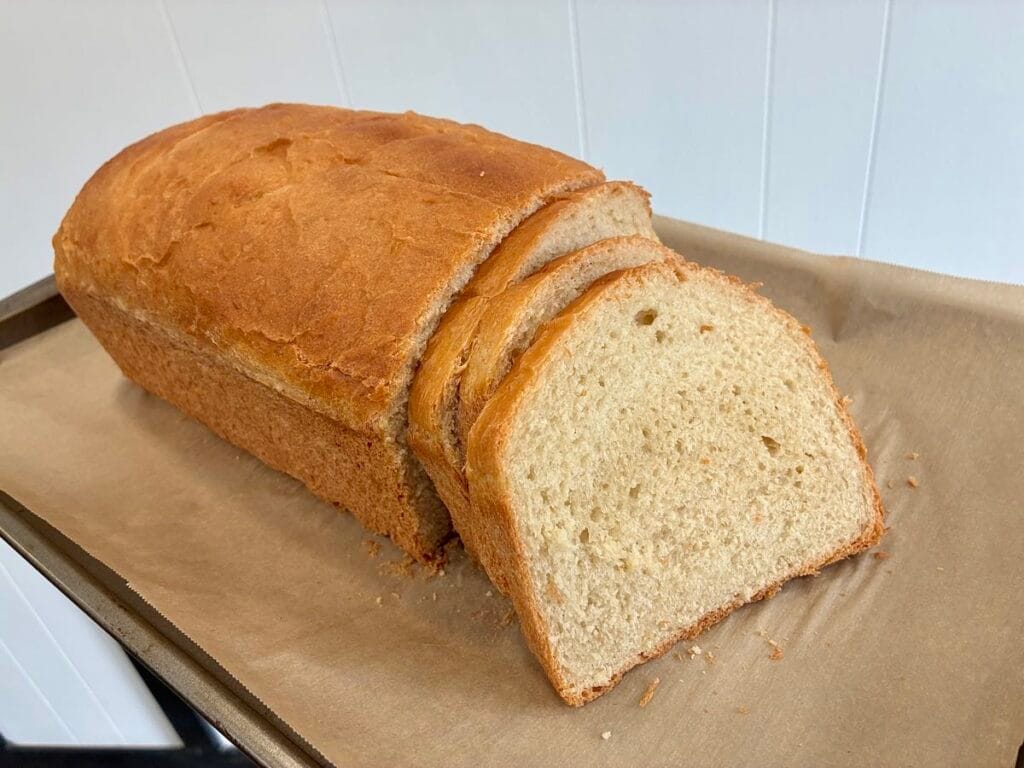
Making bread is a visual and tactile process. Keep these three critical checkpoints in mind while you bake along with the recipe card below:
1. Whisk the Salt Into the Flour First
In many old-school recipes, you might see instructions to dump salt straight into the yeast water. High concentrations of salt can instantly kill active yeast cells. To protect your rise, always whisk your salt directly into your dry flour before combining the wet and dry ingredients.
2. The “Windowpane Test” for Kneading
Whether kneading by hand or using a stand mixer, you need to develop enough gluten structure to trap the yeast’s gasses. To check if your dough is done kneading, tear off a small piece and gently stretch it out with your fingers. If you can stretch it thin enough to see light passing through it without the dough tearing, your gluten is perfectly developed!
3. Tightly Roll the Loaf to Prevent Holes
When shaping your dough, don’t just fold it into the pan. Press it into an 8×15-inch rectangle to get rid of any large, irregular gas bubbles. Then, roll it up tightly like a sleeping bag. Use your fingers to pinch the final seam and the sides tightly to seal the log so it doesn’t split open while baking.
Troubleshooting Common Bread Mistakes
“My yeast didn’t foam up or bubble.”
Your water was likely too hot or your yeast packet was expired. If your yeast mixture doesn’t look frothy and smell distinctly fermented after 5 to 8 minutes, discard it and start over. Using dead yeast will result in a heavy, brick-like loaf.
“My dough feels too sticky to handle.”
Humidity, kitchen temperature, and how you measure flour can heavily impact dough consistency. If your dough feels like wet paste after mixing, add extra flour one tablespoon at a time during the kneading process until it clears the sides of the bowl. It should feel tacky, but it shouldn’t completely stick to your hands.
“Why did my bread collapse in the center after baking?”
This usually happens because the dough over-proofed during the second rise in the pan. If the dough rises too far past 1 inch above the rim, the air bubbles become fragile and pop in the oven heat, causing the top to sink. Keep a close eye on it around the 30-minute mark!
How to Store and Freeze Homemade Bread
Because this bread has no chemical preservatives, proper storage is key to keeping it fresh:
Storing at Room Temperature
Store your completely cooled loaf in an airtight plastic bag, a reusable linen bread bag, or a bread box for up to 4 to 5 days. Never store homemade bread in the refrigerator, as the cold environment recrystallizes the starches and dries out the crumb rapidly.
Freezing for Later
This loaf freezes beautifully! Slice the entire loaf first, then place the slices into a freezer-safe zip-top bag with small pieces of parchment paper between them. Whenever you want a slice, just pop it straight from the freezer right into your toaster for instant, fresh-baked flavor.
Easy Honey Butter Sandwich Bread Recipe

Equipment
- 1 9 x 5 inch loaf pan
- 1 Large Mixing Bowl to activate the yeast in
- 1 Medium Mixing Bowl for the dry ingredients
- 1 Large Mixing Spoon
- Measuring cup and spoons
Ingredients
The Yeast Ingredients
- 1 ½ cups Warm water between 110–115°F / 43°C | 360g
- 2 ½ tsp Active dry yeast or 1 standard 0.25-oz packet | 7g
- 3 tbsp Honey 63g
The Dry Ingredients
- 3 3/4 cups Unbleached all-purpose flour – divided 450g – plus 1 extra tablespoon if the dough feels too sticky during kneading
- 2 tbsp Unsalted butter melted and cooled slightly | 28g
- 1 ½ tsp Fine salt 9g
Instructions
- Activate the Yeast: In a large mixing bowl, stir together the warm water, active dry yeast, and honey until dissolved. Let the mixture sit undisturbed for 5 to 8 minutes until it becomes completely frothy and foamy on top, proving the yeast is active and alive.
- Mix the Dry Ingredients: In a separate medium bowl, whisk together 3 ½ cups (420g) of the all-purpose flour and the salt. (Whisking the salt into the flour first protects your yeast from getting stunned by direct contact with salt).
- Build the Dough: Pour the slightly cooled melted butter directly into the foamy yeast mixture. Add the flour-and-salt mixture right into the liquid. Stir thoroughly with a sturdy wooden spoon or spatula until a soft, cohesive, and slightly sticky dough begins to pull away from the sides of the bowl.
- Knead Until Smooth: Turn the dough out onto a clean surface and sprinkle the remaining ¼ cup (30g) of flour over the top. Knead firmly by hand for 8 to 10 minutes (or use a stand mixer with a dough hook on medium-low speed for 5 to 6 minutes). The dough will transform from shaggy and sticky to completely smooth, elastic, and just slightly tacky to the touch. (Tip: If the dough feels too sticky to handle by hand due to kitchen humidity, sprinkle in 1 extra tablespoon of flour at a time).
- The First Rise: Lightly grease your large mixing bowl with a tiny splash of oil or cooking spray. Place your smooth dough ball back into the bowl, rolling it around once to coat it all over. Cover the bowl loosely with a clean, damp kitchen towel. Let it rise in a warm, draft-free spot for 1 hour to 1 hour and 15 minutes, or until it has visually doubled in size.
- Shape the Loaf: Turn the puffy dough onto a lightly floured surface and gently press it down to deflate it. Use your hands or a rolling pin to flatten it into an 8×15-inch rectangle, popping any large air bubbles. Starting from the short edge, roll the dough up tightly like a jelly roll into a snug cylinder. Pinch the final seam and the sides tightly with your fingers to seal the log so it doesn’t split open while baking.
- The Pan Rise: Place the shaped log, seam-side down, into a greased 9×5-inch loaf pan. Cover the pan gently with your towel and let it rise for 30 to 45 minutes until the dough has crowned beautifully about 1 inch above the top rim of the pan. (Crucial Tip: Preheat your oven to 375°F / 190°C right at the 15-minute mark of this rise so it is completely hot the second your bread is ready to bake!)
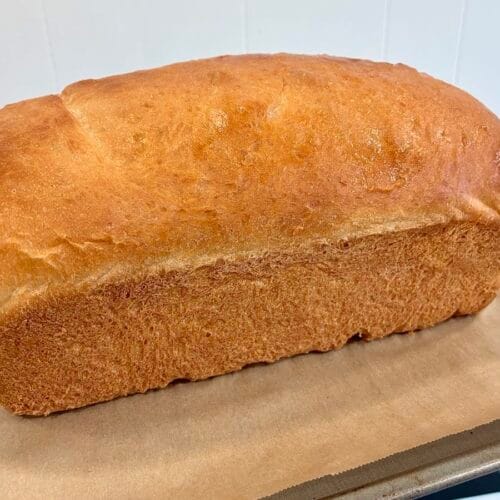
- Bake to Golden: Bake at 375°F (190°C) for 15 minutes. Slide a piece of aluminum foil loosely over the top of the pan to prevent over-browning, and bake for an additional 20 minutes (35 minutes total bake time, up to 40 minutes if needed).Baker's Finish: For a soft, matte crust, gently brush the risen loaf with melted butter before baking. For a glossy, deep-golden bakery finish (as seen in the photos), brush lightly with an egg wash (1 egg beaten with 1 tablespoon of water) instead.The crust should be a gorgeous dark golden brown, and the loaf should sound hollow when tapped. (For absolute certainty, an instant-read thermometer inserted into the center should read 190°F–200°F / 88°C–93°C).
- Cool & Savor: Let the bread cool inside the pan for 5 minutes, then carefully slide the loaf out and place it onto a wire rack. Allow the bread to cool completely (about 1 hour) before slicing so the soft interior structure sets perfectly for your sandwiches!

It is in the process. You forgot to include when to add melted butter. I added it with the yeast mixture. I added it with the warm water. I am sure it will be good
Oh wow, thanks for bringing that to my attention! You’re absolutely right about adding it in with the yeast mixture. I hope it worked out for you. Be blessed!
Quick question. Why am I preheating my oven to 375 but baking the bread at 350?
You’re exactly right, Darla. Oops! I corrected the mistake. You should definitely bake the bread at 375 degrees. Thanks so much for noticing!